These air dry clay ornaments are inexpensive, fun to make and can be shaped and decorated in so many different ways! They are also quite durable, so you can enjoy them for Christmases to come.

I keep things pretty simple and minimal, mostly using natural Christmas decorations and Christmas tree decorations that I collect for free or cheap.
I'm not usually a very crafty person, but I always feel like making new Christmas tree ornaments. The Christmas craft spirit gets me!
Last year I made some wood slice ornaments with some family photos and that was a meaningful and fun project. I'm excited to bring those out again.
Dried orange slices are an easy, cheap and natural way to decorate for the holiday season! You can use them as ornaments, make a garland, or just place them around with your other decor.
My daughter is now 2 and a half years old, so she was able to contribute to my project this year as well! We got out her washable paints and she painted her own candy canes, gingerbread men and snowflakes. If your kids make some, be sure to write their name and age on the back! That's fun to look back on.
Heck, get the whole family on board and make these for a family night!
These could make a really nice handmade gift. You can also make smaller ones with your excess clay and use them as a cute addition to gift tags or on a DIY garland.
If you've got some extra clay, check out some other air dry clay projects.

What Air Dry Clay is Best?
You can make your own air dry clay. There are homemade recipes like the one I use that are quite simple and cost-effective. But you can also save yourself a step and buy the air drying clay at the craft store or online.
How Do I Know When Air-Dry Clay is Dry?
Simply tapping with your fingers on all the surfaces of the ornament is a great way to get an idea. Wait at least 24 hours before doing this and you shouldn't leave any nail indents!
If you dry the ornaments on a wire rack, they will dry at the same rate all the way around, but if you dry them on a baking sheet, you'll need to flip them over so the back can thoroughly dry as well.

Tools You May Need
Straw
Christmas cookie cutters and or round cookie cutters
How to Make Air Dry Clay Ornaments
Materials for Air Dry Clay:
- 1 - 1½ cup cornstarch
- 1 cup white glue
- 1 tablespoon oil (vegetable, almond, any light coloured oil)
- 1 tablespoon lemon juice or white vinegar
Materials for Decorating (optional):
- Twine or ribbon (for hanging the ornaments)
- Paint (watercolor and acrylic both work)
- Paint pens
- Glitter and Modpodge
- Greenery or flowers to press or adhere
- Spray paint
- Silver or gold leaf
Instructions:
Prepare a work surface by dusting it generously with cornstarch. This is where you will roll out the dough and shape the ornaments. Keep a spoon in your cornstarch container so you can easily add more as needed.

Combine the four air dry clay ingredients (starting with 1 cup cornstarch) in the saucepan and turn on medium-low to medium heat.

Stir the mixture regularly until it looks lumpy and starts pulling away from the pan's edges.

Remove the pan from the heat, scoop the dough onto your prepared work surface and allow it to cool for 5-10 minutes.

Dust some more corn starch over the dough and begin to knead it. This will help work out the lumps and smooth the dough. If you don't knead, your clay won't have a smooth surface!

You may notice the dough is too sticky to work with. Continue to add cornstarch and knead the dough until it's smooth and barely sticky.
Dust your work surface with cornstarch again and roll the dough out to about ⅛ inch thick.

Cut into your desired shapes, either with cookie cutters or freehand with a knife.

Using the straw, cut out a small hole at the top of each ornament, about ¼ inch from the edge.

If you'd like to press any florals or greenery into your ornaments, do so now. You can leave them stuck in the clay if you like how it looks or remove them to leave the shape imprinted in the clay.
Once cut, remove the shapes to a wire rack or parchment paper lined cookie sheet. The wire rack will allow for faster and even drying, but is not necessary.

Dry your DIY air dry clay ornaments for at least 24 hours, or until the surfaces of the ornaments are all hardened.
You may choose to lightly sand the rough edges of your new ornament for a more finished look or leave it as is for a more rustic, homemade look.
How to Paint Air Dry Clay Ornaments
I used Prang watercolors for this project, but you could use acrylic just as well.
If using watercolor, keep the color quite concentrated. Basically, don't use much water, or your color will be very subtle and your ornament may start to get sticky again.
It can be fun to layer starting with light shades that are more diluted (letting those layers dry) and adding on darker colors for some depth.
For inspiration, I found some Christmas-themed watercolor art online to use as a starting point for painting my ornaments. If you're a very creative person, you may not need any inspiration, but I sure do!
It's also a great idea to do some practice painting on paper before painting your ornaments if you're a little nervous about it.


More Decorating Ideas
- Use paint to lightly brush over an impression of a branch, flower or leaf to make it stand out better
- Brush the ornament with a thin layer of mod podge, sprinkle on some glitter (over a pan or something!) and shake off the excess. Once it's dry, it's a great idea to apply a layer of mod podge on top. This will seal in the glitter so it won't leave a trail around your house, because that's not much fun to clean up! Use glossy mod podge because if you use the matte version, your glitter will be duller.
- Use paint pens or even regular markers to draw or color your designs.
- Spray paint the ornaments in different colors.
- Dust with gold and/or silver leaf for an elevated look.

How to Hang Air Dry Clay Ornaments
The hole you made with the straw will close slightly after drying. You can use the end of a bobby pin or paper clip to help you get the string or ribbon through the holes if needed.
There are many ways to tie a loop on ornaments. You can simply thread the string through and tie it in a knot which will create a really easy loop. This way, the ornaments tend to hang a little angled out.
Alternatively, you can tie a loop first, then feed one end of the loop through the hole of the ornament, push one end of the loop inside the other one and pull it through and tight. This way is a bit more time-consuming, but the ornaments will lay flat on your tree.
And of course, feel free to add a bow to the top of the ornament if you'd like!
If you're into essential oils, at this point you could add a drop or two of a Christmas-y scent to the back of the ornaments, allow them to dry, then enjoy through the Christmas season.

How to Store Air Dry Clay Ornaments
Store your clay ornaments in an airtight container or bag in a cool, dry place while they aren't on display!
Did you try this DIY? If so, I would really appreciate a 5-star rating and your comments below. Thanks!
More DIY CRAFT PROJECTS
- HOW TO MAKE DRIED ORANGE SLICES
- WOOD SLICE CHRISTMAS ORNAMENTS
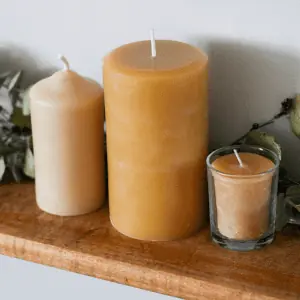
- HAND-DIPPED BEESWAX CANDLES
- DIY GLITTER VASES
- DIY WREATH AND SPHERE
CHRISTMAS INSPIRATION
- CRANBERRY CHRISTMAS CAKE
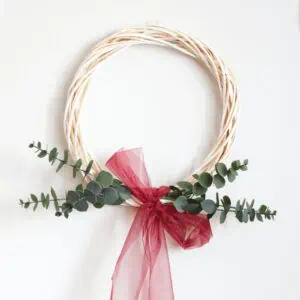
- MINIMALIST CHRISTMAS WREATH
- GRANDMA'S GERMAN GINGERBREAD COOKIES
- 40 BEST MINIMALIST GIFTS FOR HIM | CLUTTER-FREE GIFT IDEAS
- MERRY CHRISTMAS BANNER | FREE PRINTABLE
📖 Recipe

Air Dry Clay Ornaments
These air dry clay ornaments are inexpensive, fun to make and can be shaped and decorated in so many different ways! They are also quite durable, so you can enjoy them for Christmases to come.
Materials
Air Dry Clay
- 1-1½ cups cornstarch
- 1 cup white glue
- 1 tablespoon oil (vegetable, almond, any light coloured oil)
- 1 tablespoon lemon juice or white vinegar
Optional Decorations
- Twine or ribbon (for hanging the ornaments)
- Paint (watercolor and acrylic both work)
- Paint pens
- Glitter and Modpodge
- Greenery or flowers to press or adhere
- Spray paint
- Silver or gold leaf
Tools
- Saucepan
- Rolling pin
- Straw
- Christmas cookie cutters and or round cookie cutters
Instructions
- Prepare a work surface by dusting it generously with cornstarch. This is where you will roll out the dough and shape the ornaments. Keep a spoon in your cornstarch container so you can easily add more as needed.
- Combine the four air dry clay ingredients (starting with 1 cup cornstarch) in the saucepan and turn on medium-low to medium heat. Stir the mixture regularly until it looks lumpy and starts pulling away from the pan's edges.
- Remove the pan from the heat, scoop the dough onto your prepared work surface and allow it to cool for 5-10 minutes.
- Dust some more corn starch over the dough and begin to knead it. This will help work out the lumps and smooth the dough. If you don't knead, your clay won't have a smooth surface!
- You may notice the dough is too sticky to work with. Continue to add cornstarch and knead the dough until it's smooth and barely sticky.
- Dust your work surface with cornstarch again and roll the dough out to about ⅛ inch thick.
- Cut into your desired shapes, either with cookie cutters, or freehand with a knife. Using the straw, cut out a small hole at the top of each ornament, about ¼ inch from the edge.
- If you'd like to press any florals or greenery into your ornaments, do so now. You leave them stuck in the clay if you like how it looks or remove them to leave the shape imprinted in the clay.
- Once cut, remove the shapes to a wire rack or parchment paper lined cookie sheet. The wire rack will allow for faster and even drying, but is not necessary.
- Dry your DIY air dry clay ornaments for at least 24 hours, or until the surfaces of the ornaments are all hardened.
- You may choose to lightly sand the rough edges of your new ornament for a more finished look or leave it as is for a more rustic, homemade look.
How to Paint Air Dry Clay Ornaments
I used Prang watercolors for this project, but you could use acrylic just as well.
If using watercolor, keep the color quite concentrated. Basically, don't use much water, or your color will be very subtle and your ornament may start to get sticky again.
It can be fun to layer starting with light shades that are more diluted (letting those layers dry) and adding on darker colors for some depth.
For inspiration, I found some Christmas-themed watercolor art online to use as a starting point for painting my ornaments. If you're a very creative person, you may not need any inspiration, but I sure do!
More Decorating Ideas
- Use paint to lightly brush over an impression of a branch, flower or leaf to make it stand out better
- Brush the ornament with a thin layer of mod podge, sprinkle on some glitter (over a pan or something!) and shake off the excess. Once it's dry, it's a great idea to apply a layer of mod podge on top. This will seal in the glitter so it won't leave a trail around your house, because that's not much fun to clean up! Use glossy mod podge because if you use the matte version, your glitter will be duller.
- Use paint pens or even regular markers to draw or color your designs.
- Spray paint the ornaments in different colors.
- Dust with gold and/or silver leaf for an elevated look.
How to Hang Air Dry Clay Ornaments
The hole you made with the straw will close slightly after drying. You can use the end of a bobby pin or paper clip to help you get the string or ribbon through the holes if needed.
There are many ways to tie a loop on ornaments. You can simply thread the string through and tie it in a knot which will create a really easy loop. This way, the ornaments tend to hang a little angled out.
Alternatively, you can tie a loop first, then feed one end of the loop through the hole of the ornament, push one end of the loop inside the other one and pull it through and tight. This way is a bit more time-consuming, but the ornaments will lay flat on your tree.
And of course, feel free to add a bow to the top of the ornament if you'd like!
If you're into essential oils, at this point you could add a drop or two of a Christmas-y scent to the back of the ornaments, allow them to dry, then enjoy through the Christmas season.
Notes
Store your clay ornaments in an airtight container or bag in a cool, dry place while they aren't on display!


Leave a Reply